Showing posts with label WUAC Wednesday. Show all posts

Thursday, April 9, 2009

Mojo 81 and Late WUAC Wednesday

Here's another cool layout from Mojo Monday. I had to combine it with WUAC because I've been so uninspired lately. And I know it's technically Thursday now but I was making it on Wednesday! (If that counts!) The card ended up really really busy for me and lots going on. I usually like the CAS (clean and simple, I finally learnt) cards and my stamps ended up being way jimongo for my card. Jamie said it's very Easter and he's absolutely right! I wasn't trying to make it Eastery but I was really liking the patterned paper and the rest sort of followed. The card also took me ridiculously long but then again, when does a card ever not?


So Regan, this week's challenge is to play the Mojo 
Monday because there's a prize! If you're not feeling it, then perhaps make something that uses patterned paper since I know you got that huge bag from Costco like me! And if Arlie is reading this... I WANT TO SEE YOUR STUFF ALREADY!!


Ingredients: 
Stamps: Snag 'em Stamps from imaginisce So Tweet and Chick
Paper: Stampin' Up cardstock in Lavender Lace and Barely Banana, K & Company patterned paper, paper flowers from Staples
Accessories: So Saffron grosgrain ribbon from SU
Supplies: Coluzzle, corner rounder, dimensionals, white gel pen

Wednesday, April 1, 2009

WUAC Wednesday

So this week I've decided to change it up a little bit. I'm not sure how useful it was for me to post all the pictures of the cardmaking process. From now on, WUAC Wednesdays will just feature a card I've made! Plain and simple. And Regan, as you've probably noticed, you're the only one who plays! And I know sometimes it's a challenge for you too! So I've decided to not add Mister Linky because it's just extra work that isn't needed. Regan can you just put your link in the comment section? Please and thank you!! 

Now moving onto the actual WUAC part. I had an open house on Saturday and had prepped a bunch of little 3x3 cards. No one ended up making any so I took the luxury of making all of them myself! I used a bunch of random things and got to use my punches! I'm really loving the new scalloped oval in the new mini catalogue that is available TODAY! The coordinating set is super cute and I'm glad I got good use out of it. Now a challenge for you this week isn't to relate your card to mine but to create a cute little 3x3 card! Simple enough still right? 

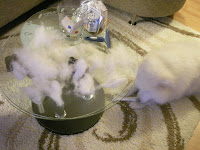
And I just had to throw in some pictures of Khuno. He's in almost full shed mode. Well at least we think so. It's our first "shedding" season since we've had him and yesterday night I managed to come out a little ball of it from JUST the bottom half of his two front legs.... Now can you imagine the rest of the body?!?! And just to let you know, the picture of the black thing is actually my pants!! 

Thursday, March 26, 2009

WUAC Wednesday (Thursday....)

  So this week's WUAC Wednesday is a little bit different. I won't be posting a series of photos that will go through the process of me whipping up a card. Instead, this week I'm just posting pictures of a project that I'll be having guests make at my open house this Saturday! So the two pictures feature a gift card holder. Jinnee actually found the template online found HERE. A SUPER cute gift card holder that is really easy to make with a few score lines and some paper and sticky strip. Now here I've made it using Sahara Sand, Olid Olive DSP, Always Artichoke and either Not Quite Navy or Rose Red. I'm not 100% thrilled with the color combination. I had a really tough time pairing colors up with the Old Olive DSP. I think I might play around with some other papers I have and come up with a different color scheme for the open house. Speaking of which...

So this Saturday between 12 and 3 pm, will be my very first public open house. I don't have huge plans for it to be honest. I've got some friends coming and a neighbor. I did post a big sign up on my window and had a poster up on a community bulletin board at Sobey's for a few days but I really don't suspect it'll draw a lot of people in. And of course I did a massive Facebook invite and I've got a couple responses from that. Along with my open house, I'm having my friend Rosie over who is an Epicure consultant. I'm super excited to have her because the first time I was at her open house I didn't buy a lot of things but the more I use what I bought, the more I want to buy!!! Makes me uber excited. I'll have to clear out some space in our "pantry" (really just a china cabinet that the previous owners let behind for us).  So I'll post some updates after the open house and hopefully get some pictures and what not. If you're in the city and interested in coming, leave me a comment with your contact info and I'll get some more info to you. 

G'nite! 

WUAC Wednesday Rules:

1. You have 1 week to make a card inspired by the card I've made. It can be any inspiration that is related to this card. So that means it can be the same layout, design, stamp set, colors, etc etc.

2. Link it to Mister Linky below. If I find a spam link or if you link incorrectly, it will be deleted. Link to the blog entry and NOT to your general blog.

Wednesday, March 18, 2009

WUAC Wednesday

So this is finally a WUAC Wednesday that I haven't combined with another card challenge. Why you may ask? Because I'm sick and I'm tired and it's late and most of all, I'm lazy. =) So I started off this WUAC Wednesday with a 3.5"x3.5" card. I trimmed the one edge to be 1/4" shorter so I'd be able to scallop the edge and be able to fit a sentiment so your cardstock should be cut at 6.75"x3.5"
Next I took my beloved scalloped edge punch to put a nice border. Remember to scallop the shorter edge!! I've scalloped the wrong edge many many times. Now I know many of the punches we use, we face it upside down so we can see what we're punching and I was doing the same thing with the scallop edge punch, lining up the scallops from the bottom. But alas, I figured out a nicer way!! You ever go to punch an edge and realize at the end that you never end up having both sides of your paper end off on the same scallop? One side may have a full scallop while the other side has 1/2 a scallop or worse, 1/4 scallop. So what you can do now, and SU has designed it quite nicely (just took me a while to figure it out!) is take your paper and line up your two paper edges along the picture they've given you to see how you'd like the two ends to look. I've found my paper would look best with about 1/2 scallops so that's where I start. I punch right in the middle of my card (not moving my paper from where I've lined up my edges).
Next I just line up the punched scallops to the scallops on the front rather than on the bottom like I was doing before. Also helps punching this way because you can push down as opposed to using just your fingers when you had to look at the punch from the bottom to line up. I don't know about you but when I figured this out tonite, I thought it was ingenious!!! Perhaps everyone already knew this but boy do I feel SMRT!! (and yes, I meant SMRT)

These cards are super easy to make so I whipped up a bunch of them. Here I've scalloped 4 little guys.


Next I used SU's Seeing Spots stamp set that I accidently aquired when I ordered it by accident for a customer. I started with Sahara Sand and the boldest stamp out of the set.


Next I used Chocolate Chip.


Now you can put ANY color here which is the nice part. Just make sure you've got matching cardstock and any color would look great on here. I've used the retired Blue Bayou and in color Riding Hood Red.


I was looking for a nice solid sentiment and decided to steal the sentiment from SU's Upsy Daisy. I love that set. Now I didn't want to use the "for your friendship" portion so that's where SU markers come in. I love how you can pick and choose what to stamp in whatever color you want with the markers. So I took Chocolate Chip and colored just the "Thank You".


Now here's the finished card. All I did was stamp the sentiment and cut out a little strip of coordinating cardstock 3.5"x 0.75" and glued it on. I actually came up with this card one day with Regan. She was making a V-day card and I was trying to copy the Simply Sent Elements and More kit in SU's current catalogue. I made it a bit larger and gave it to Regan for her 30th birthday. I also did coordinating envelopes for these little guys.


WUAC Wednesday Rules:

1. You have 1 week to make a card inspired by the card I've made. It can be any inspiration that is related to this card. So that means it can be the same layout, design, stamp set, colors, etc etc.

2. Link it to Mister Linky below. If I find a spam link or if you link incorrectly, it will be deleted. Link to the blog entry and NOT to your general blog.

Wednesday, March 11, 2009

WUAC Wednesday, iheart2stamp & TCPTues49 Challenge


Well it's my very first iheart2stamp AND TCPTues challenge. It's also another week of WUAC Wednesday!!! Now I know Regan and Arlie are the only two that play WUAC Wednesday but I still enjoy sharing a card on Wednesdays. Well maybe it's starting to become a bit tiring because I'm always staying up late posting Tuesday night. Tuesday is also when we go over to Jamie's parents house for supper. So I didn't get home till just after 9 pm. Then I had to poke around and see what I wanted to make! So of course now it's 12:30 and I'm tired tired tired!!

So the challenge colors are light pink, light yellow and light blue. Boy oh boy did I have a hard time combining those colors with the sketch. I described the color challenge to Jamie as such, "Oh boy, oh wait, girl, oh wait, gender neutral." So I decided to use some pink as the main color since I've been in a girly mood lately. Why you might ask? I have no idea why... LOL. So here I decided to start with a regular A2 white base, then I cut Pretty in Pink at 3.5"x4.5" and Pink Pirouette 1/8" smaller all around.

Next I needed to try and incorporate some light yellow so I chose to stay in the Soft Subtles family and used Barely Banana in 4"x2 1/8" and layered some Pretty in Pink DSP on top (cut 1/8" smaller again).


Then I cut the next layers using Barely Banana, Pretty in Pink and Whisper White. The Barely Banana is cut at 3"x 2 1/4" and the rest 1/8" smaller (and so forth).


So now it was time to include the dreaded blue!! I pulled out Baja Breeze, Bashful Blue and the retired Soft Sky. I also decided to use the Itty Bitty Buds set because it's the only floral set that I felt suited the colors and had enough different small sized stamps that I could use the different blues with.


So I stamped an extra blue flower just to the bottom right of the picture to cut out and have a yellow brad in it to put a touch more yellow. (I'm not sure which "yellow" the brad is.. I think it's actually So Saffron).


This picture I just wanted to take to show how many flipping layers this card has. I think Arlie is absolutely right. I'm a big layer-er... She's a big border user, although she did make 2 cards WITHOUT border punches!! I haven't seen them yet though because I can't convince her to start a blog!


Now for the gluing together. I wanted to use a friendship stamp so I can give this card to Jinnee and of course I had originally cut out a flower already that's beside the sentiment and glued it in place but then I had no room to stamp! What'd I do? I tried to stamp anyways so I ended up stamping it crooked. Gr...Chucked that and redid the whole thing.


Now I skipped a few steps but they're pretty easy to imagine. I bought these two buckets of little flowers at Staples!! Only cost $5 each and you get loads of them. They both also have a little goldish shine to them. Like they're sprinkled with gold dust or something. They say bride because they're actually table confetti. So I just took a few of those, pierced a hole with my crafter's tool kit and added some yellow brads. I actually retract my guess that it's So Saffron and I change it to Barely Banana because it's a Soft Subtles brad pack... Anyways then I used some pop-up glue dots, cut them in half and glued them in place. Lastly to finish off I cut a piece of Bashful Blue cardstock and DSP and layered that on. The sentiment is from the retired SU! set Best Yet. Boy do I LOVE that sentiment set. Probably my most used set to date. Alright, lets see if I can get into bed by 1 am. G'nite!!


WUAC Wednesday Info:
1. Your card needs to somehow link to the one I've posted. It can be the same layout, colors, embellishments, stamp set etc.
2. Link to your blog entry (NOT your main blog) in Mister Linky below. Any links that are entered incorrectly or do not actually have a WUAC card will be deleted.
3. There's no time limit but there's a new WUAC every week.

Wednesday, March 4, 2009

WUAC Wednesday & OCC Sketch Challenge

So yet again another late night for WUAC Wednesday. I really gotta find a way to post WUAC Wednesday eariler. Perhaps I should start cheating and just make up the post over the weekend and just save it as a draft till late Tuesday nights. I'll have to definitely think of something because these late nights are killin' me! Especially since I've got to wake up early tomorrow for work. So lets get started! This week's WUAC Wednesday I've combined with my very first Our Creative Corner (OCC) sketch challenge.

If you remember my huge rant about Treehousestamps, well this is one of the stamps that I got from there. I'd probably just get future Greeting Farm stamps directly from their website. So this super SUPER adorable stamp is called Angel Anya. There's a huge series of Anya stamps and I've got 3 of them: angel Anya, nurse Anya and teacher Anya. I also have little cute Ian as well. Now for some reason I had really wanted to use the blue designer paper from SU.


So I cute out your basic card base (5.5"x4.25") and made the blue designer paper 1/8" smaller to layer onto the white base. I stamped angel Anya in StazOn onto water color paper. I used StazOn rather than regular black Stampin' Up classic ink because I was planning on watercoloring the image and StazOn will prevent any smearing.


Now as usual I'm in a little bit of a rush to get to bed so I didn't even bother taking photos of the coloring. I was determined to color the entire image with just blender pens but alas, I had to succumb to the aqua painter and used it a touch as well. I attempted to do the oh so popular shading but it didn't turn out quite as hot. I first colored all the hair in Barely Banana. Then I just took Summer Sun and went around some of the edges. I have no idea where the "sun would hit" so I just color whatever. The dress is a combo of Pink Pirouette and Rose Red.


Next I needed to use my trusty Coluzzle to cut out an oval shape. You get two templates when you buy the Coluzzle from Stampin' Up (one oval and one circle). Super easy to use. Just line up your paper and use the blade that's with the kit, stick it in the groove and pull. Super simple.


Decided finally to layer the Whisper White onto some Brocade Blue. I would have never used that blue but thanks to Kristina's last color challenge, I still had pieces of it floating around.


Now this part made me super sad about my Coluzzle. I really hate how the size difference between one oval and the next is SOOO gimongous. I really had a smaller border in mind but at this point I couldn't figure out how to alter the template to get me a smaller cut.


Now I know you might think this picture and the previous one are exactly the same at first glance but look closely. I thought the white background was a touch plain so I took out the trusty sponge and sponged the background with Bashful Blue and Summer Sun.


Now I skipped a few pictures here but I'm really trying to save on time. I cut out a strip of Whisper White and scalloped the edge. Than I layered onto it a sheet of the exact same designer paper but just flipped (Yes the polka dots are on the other side of the swirly). I needed to add some ribbon to the card to tie it into the sketch so I used some Vanilla satin ribbon from Walmart and some blue ribbon I've had for probably over 10 years now that I just haven't used.

Glued both the extra piece of cardstock on and my ribbon. Lastly I popped up both Anya and the main oval with dimensionals.


To finish off the card I needed a little something something in the corner so I pulled out my trusty Prisma flowers and decided to add a pink and yellow one together. I put them together with mini glue dots and added a pearl from my Pretties Kit. Then I added it to the card with a pop-up glue dot.
Final product.... Tah dah! That only took me eons to do!! Boy watercoloring really takes a long time. Especially when you suck at it. Oh and in case you haven't noticed... I actually did a few more things. I pierced the edge of the oval for something extra and I also hand cut/eye-balled the Brocade Blue oval to make it smaller. Hope you've enjoyed another WUAC Wednesday and that you'll WUAC and post it for all to see!


If you'd like to play along for WUAC Wednesday, the rules are simple:
WUAC that has something related to the card I've made. It's being kept real simple right now so that means you can do anything!! It can be the same color, the same stamp, the same embellishments, the same technique or even the same tool (Coluzzle or scalloped edge). Post the link to your blog entry in Mister Linky below. Please do NOT just link your main blog address or link to your blog if you are not playing along. Those links will be deleted.

**P.S.** I have NO idea why the pictures and spacing are so messed up. I looked and looked at the html and all the coding stuff. I'll have to try looking again another day. It's 1:30 and I gotta wake up for work soon enough. So sorry about the hard read with spacing and such. Hopefully I can fix it. G'nite!

Wednesday, February 25, 2009

WUAC Wednesday / Mojo Monday 75 / Caardvarks Challenge

Hi gals (and maybe Jamie...). Can't believe it's already time for another WUAC Wednesday! This week I've decided to hit THREE birds with one stone. I know that's not how the saying really goes but it sounds better than killing two birds. I've combined this week's WUAC with Mojo Monday #75 and Caardvarks challenge to use kraft. Just a fair word of warning, my goodness there's a lot of layering this week. Like TONS as you can tell from the sketch on the left. So it's already 1:30 AM so we best get going.


I wanted to use a bit of designer paper as I haven't done so in a long time so I flipped through the little 6x6 pads that are usually found with Stampin' Up's lvl 1 hostess choices. The only one I really liked was the "Real Red" sheet but it totally looks way more like Rose Red. So I pulled out some kraft cardstock and rose red to match.


So as the sketch shows, it needs a scalloped edge and man do I ever LOVE my scallop edge punch. To think I used to do it with a corner rounder!!!


Next I decided the kraft cardstock needed a lil something something. So I whipped out my very new Bella Toile background stamp. At first I thought this background might be a bit floralish for me seeing how I don't like tacky floral backgrounds but for some reason I just adore this stamp. I inked it up upside down with sahara sand because there's no kraft pad.

Then I realized that layering it onto just rose red was sorta bland so I threw in some basic black! Now as I was taking the picture and checking back to the sketch I realized that the colors are pretty much the sketch colors!! Oh well... I'm copying the sketch and the colors I guess. Too late to turn back now.


So now I'm trying to figure out how to layer what and where... So in my mind I think I've got it straight.


You can see in this picture that I did lots of cutting (stupid extra piece of kraft in there took forever and it still doesn't sit perfect). I FINALLY got my order from Treehousestamps after I ordered it over 1 month ago. It was shipped about 3 weeks AFTER I ordered it. The lady only sent me an email saying that she lost internet due to a snow storm and was waiting for a backorder item AFTER I emailed her and complained and wanted to cancel my order. Arlie also ordered and complained and got the same email.. But alas, we both got our orders and needless to say, we're NEVER BUYING FROM TREEHOUSESTAMPS AGAIN. But back to the picture, I bought these little Dew Drops I guess they're called. Comes in a little shampoo like bottle with screw top lid and everything. I thought those'd be perfect for the little embellishments needed on the side.


Another new thing I got with my last order: Craft Stampin' Spots!! I was uber excited to try it out and only JUST realized tonite that my beloved rose red is actually in the RICH REGALS family!!! I was devastated for about 10 seconds before I realized I'd just try ruby red. So I get it open and stamp a bit onto some scrap paper and this is what I got.. Goops of grayish black color. I was mortified!!


But then I stamped it out and it was all fine. The stamp is from the new Fifth Avenue Floral stamp set. I love that set. I wanted it stamped onto the little sentiment part but the rose ended up being too big. So wasted some paper, embossing powder, ink and most important TIME!!


Pulling into the home stretch here... I decided to ticket punch the corners a touch for added... I don't know... Elegance? Thought about adding a sentiment as opposed to an actual picture in the middle so from the same Fifth Avenue Floral set is a great sentiment. Stamped that guy in basic black, threw in a whole bunch of dimensionals and voila! Lets call it a night cuz it's 2 AM on the dot. G'nite


So to play WUAC Wednesday the rules are simple. All you need to do is use SOMETHING from my card. You can use the same layout and link it to Mojo Monday as well. You can do something in kraft and link it to Caardvarks. You can use the same stamp sets or even just the same colors. I'm not sure how many of you have Dew Drops but you can just use the same embellishments too. Link it below and my dedicated 3 followers (maybe 4) will hop on over to your blog and take a gander!