Saturday, December 15, 2012

FTL #221

I got to spend a lovely afternoon with my good friend Jinnee from Sketch Cuts. We got our December order from Studio Calico, called 34 Street Card Kit and we decided to make a pact with our new subscriptions to their card kits. We would get together monthly to use our new kits rather than have supplies accumulate and collect dust. That's exactly what we did today! Our goal was to make 8 cards since there was 4 sheets of card stock in the kit but we only got to 3. I chose to use Fall To Layout #221 as a layout so here is my take on it! 


Sunday, November 4, 2012

Ribbon Color Trends & JUGS #161

Happy Sunday everyone! It's amazing how the extra hour of time can make you feel like you've gained eons of time! While my hubby is busy with renovations, I'm sitting in the basement surrounded by my beloved paper and stamps. Here's a combined challenge which I haven't done in a very long time.  The sketch is simple to use and the colors are uber spring, which is a nice change from all the snow we have outside right now. I forgot how much I loved the stamp set Elements of Style. I usually stamp it with Versamark and use chalk to color in the image but using markers to color the stamp work just as well! The frame and sentiment is from Papertrey Ink's Framed stamp set. This is my take on Just Us Girls Challenge #161 and Embellish Magazine's Ribbon Color Trends Challenge


Saturday, November 3, 2012

JAI 142


I haven't participated in a card challenge in ages. There's been way too many other crafting musts in my life right now and card making wasn't making the list on top 3 things to do. But with my entire basement dedicated to paper crafting, I felt the need to get back into it. The crochet hook will just have to wait till another night. I know this whole "Keep Calm..." catch phrase has been going around like mad, but I couldn't help but purchase the darn stamp set. This is from Stampin' Up! called Carry On. The little cupcake is from the stamp set Create & Cupcake. Can you believe I've owned this stamp set and the coordinating punch since it was released but it's the first time I've inked up this up? You know you have it bad when you haven't inked over half your stamp sets up but you continue to buy more. Anyways, this is my take on Just Add Ink's sketch #142. Have a great weekend and remember to turn your clocks back an hour! 


Saturday, October 27, 2012

October 29!


Exciting News from Stampin’ Up!

15% off all STAMPS – for ONE DAY ONLY!

This is a first as far as I know for Stampin’ Up!   On Monday, October 29, 2012 Stampin’ Up! is having a ONE DAY stamp sale!  For 24 hours only, almost every stamp we sell will be reduced 15 percent! We’re calling this the Sell-A-Stamp Spooktacular, and the goal is to sell more stamps in a single day than ever before.
This means all stamps in the current catalogs including
    • Background stamps
    • Personalized name stamps
    • Cookie press stamps
    • Single-image stamps (our new trial program which includes 10 more stamps including 3 brand new ones).  Single Stamps are all shown in my online store Stamps/Single Stamps

The sale DOES NOT include
    • Hostess sets
    • Bundled stamp sets
    • Digital stamp brush sets
If you'd like to order something, you can do so online or email me! 

Wednesday, October 24, 2012

Halloween Treats

This is an easy peasy project for Halloween if you're wanting to spice up those  appetizers for your party. These pinwheels have been around since Stampin' Up! came out with Simply Scored. Just cut 1"x12" strips of paper, score every 1/2" and then flip the paper over and score every 1/4". Then fold along the score lines (remember the bump gets folded into the middle of the fold) alternating like an accordion. Cut off one of the last 1/4" panels and attach some Sticky Strip to it. Glue together and punch out a 1 1/2"circle as a base. You can try using several pieces of Sticky Strip on the circle or use a Sticky Sheet. Push the centre of the paper down and while keeping the circular shape, put your punched out circle down to secure the pinwheel. Add a sentiment, tape onto wooden sticks and viola! Happy Halloween! 

Tuesday, August 21, 2012

Circles!

I'm thrilled with how the first card turned out. Then I decided to try and jazz up the second one. Definitely don't love it as much but I had gone through all the trouble of lining up the circles to punch out and you all know how much I hate wasting. The circular flower stamp is from the stamp set, Just Believe. I used a Stamp-A-Ma-Jig to line up the pattern but I think I would've liked it more if they were random. 


Saturday, August 18, 2012

Scraps Again.

More cards that use up scraps. I'm really enjoying the versatility of the "Sending you" sentiment. The stamp sets used are Stampin' Up's Mixed Bunch and Papertrey Ink's Big & Bold Wishes. 

Wednesday, August 15, 2012

Little Leaves

Remember when I CASEd Andrea at Work in Progress? You can see the blog post here. I really liked the idea of the negative silhouette, but cutting out the stamped image to get the effect was just way too much work. I shrank down the square and used the Little Leaves die instead and it turned out great! Saved me tons and tons of time and grief. 


Saturday, August 4, 2012

Dots, Dots, Dots!

Just wanted to share a card I made a couple months ago for my friend, Amanda. She just started as a stylist with Stella & Dot and as part of her great customer service, she gives all her hostesses a thank you card! You can see some of the gorgeous jewelry here. Beware though because I spent a lot when I hosted a show! 

Thursday, August 2, 2012

Words, Words, Words.

I absolutely adore Crumb Cake. I love how it's neutral enough to use everywhere but not so plain that it's blah. Here I've CASEd the lovely BeStempelt. I think she's German? I'm totally guessing based off the blog's foreign language. I really like how her image was stamped onto a longer piece of card stock. Unfortunately, I looked and looked but couldn't find a stamp that had a nice long stem like hers. Instead of actual pearls like she used, I used Liquid Pearls. Remember those? The trick to having them not look like little pointy pieces of poop or a cold nipple is after you've applied it, hold your card stock up face up and flick it from underneath a few times. This settles the liquid a bit and makes it look more rounded. 

Wednesday, August 1, 2012

Birthday Love

I recently used an American Crafts scrapbook layout as inspiration for both scrapbook pages and cards! These cards actually threw me for quite a look. First off, I made the blue one but when I went to put the sentiment using rub-ons, I ran out of room!!! The darn doily was too far over. I couldn't salvage it no matter what I did because I glued the doily on with liquid Tombow. The paper ripped to shreds and took the card front with it! So then I set out to make another one. This time, I got all confused with my words! The bottom blue card was supposed to say "birthday wishes" but then I started putting the word "happy"! I screwed up twice so ended up using way more rub-ons than needed. In the end, it turned out quite cute! Here's the original link to the inspiration. 


Sunday, July 29, 2012

Using Up Scraps

Calling all frugal crafters! I hate wasting paper, especially when it's nice patterned paper! If you're like me, you probably hoard all the little leftover scraps from projects and keep them stashed away, hoping to use them up one day. I found a gorgeous card from Cristina that does just that! You can see her beautiful card here. I think the paper she chose works way better than the ones I did, but I'm okay with that because I got to use up a few pieces of scrap paper I had on my desk. 

Doubling Up!

I'm all about trying to be efficient when it comes to card making so whenever I'm creating a card, I will try to make 2 at least. Today I was inspired by Connie's card over at Constantly Stamping. I loved the pop of Poppy Parade and the simplicity of the card. Here's my CASE. I still like how Connie used Poppy Parade because it pops way better than Rose Red, but I'm trying to clear my desk of old DSP. Have a great weekend everyone! 

Tuesday, July 17, 2012

New Goodies!

I haven't found time to stamp in a while but since I have a meeting tomorrow, I needed to make up some swap cards! I have so much retired merchandise that I had to peruse the new catty to check if the items I wanted to use were still available or not! I used to know the catty inside and out... Now I feel ashamed that I don't even know what's current anymore! Worst. Demonstrator. Ever. Period. On a positive note, I did finally bust out some new items! Our stamping team was given a specific layout for inspiration, found here. I've been leaning towards a more vintage look as of late so I brought out the beloved Elements of Style. Oh my how I've missed inking that baby! I paired that with the new Papaya Collage stamp set and the new In Colors, Primrose Petals and Summer Starfruit. This is the first time I got to use the new foam pads that Stampin' Up! has introduced and let me tell you folks, I'm in love! It inks up my stamp like 1000X better. Even with a big stamp like Elements of Style, it took minimal effort. All I can do now is pout because I own every single color in the traditional felt pad and it makes me sad. Do you think I could sucker someone into buying all my old stuff so I can buy all new stuff for myself? Yah... I didn't think so either. The butterfly stamp actually has a space in between the wings and I knew I wanted to use pearls to fill that gap. Instead of putting 3 pearls on individually, I used the long strip of mini pearls that comes in the pack of Jewels Basic Pearl and just cut them into 3s. It worked out perfectly and I still have a string of about 9 pearls left. Add some Soft Suede sponging for that worn look and ta-dah! I'm very happy with the turn out. Now it's off to bed! 

Wednesday, July 11, 2012

In My Thoughts

It's been almost 2 whole months since my last post, but as the title says, crafting has been in my thoughts! I recently returned from my honeymoon in Europe, where I did manage to journal and craft using a Smashbook. That was so fun and I'm so happy I did it. Then between getting ready for the trip, the trip itself and starting a new job, I just haven't found a lot of time to blog. This card is actually from a few months ago. The inspiration came from Andrea over at Work In Progress.  It uses a Papertrey ink stamp and was a lot more work than you'd think. I stamped the image and actually took my paper snips and cut it out to create the negative space. Despite the amount of time and energy it took, I think it turned out great and have since made variations of the same thing. 

Sunday, May 13, 2012

Happy Mother's Day

I absolutely fell in love with this color combination when I came across it on It's a Stamp Thing's blog. I also really liked the layout so I CASEd her card and am really happy with how it turned out. You could actually put whatever saying in the middle and it's be a great card for any occasion. I love the stamp set, Apothecary Art and the matching Labels framelits. One day this summer I'm going to sit down and crank out a ton of these suckers using up my leftover DSP. Happy Mother's Day everyone! 

Wednesday, May 9, 2012

Clean & Simple

I fell in love with Susan's CAS card layout found here and decided that it was definitely copy worthy. So I set out to CASE her card and I love how they turned out! The white on white looked better in Susan's photo than the cards that were sitting in front of me so I decided to layer all the rectangles and pop them up on dimensionals. You could stamp any sentiment in that top right corner since the flowers and colors are suitable for any occasion... Except a manly man's birthday. Unless said manly man is so manly that he's comfortable with his femininity. 

Tuesday, May 1, 2012

Happy Birthday

I've been trying to make more cards lately but it hasn't been easy finding time. I think that's why I've resorted to taking all my card photos with Instagram. It's quick and easy, requires no processing on the computer and it pops right onto my photostream through iCloud. I've been making a lot of pink cards lately for some reason. I definitely need to start branching out as I don't think all my girlfriends love pink as much as I'd like to think they do. 

Sunday, April 29, 2012

A Surprise In The Mail

Jamie came home one day and passed me a letter from the mail. It turned out to be a lovely hand stamped card from my good friend, Penny! I love simple cards and this fits the bill just fine. =) Thank you Penny! Your card is beautiful! 

Tuesday, April 24, 2012

More Thank You's

Happy belated Earth Day everyone! It's been crazy busy around our little household. But I did manage to find time to craft a few weeks ago. Did I ever mention that I absolutely love my new Labels framelits from Stampin' Up? I was waiting for so long for Stampin' Up to come out with a die this shape and when they did with this past mini catalogue, I was ecstatic. This will be something that I'll use again and again. Here's another couple thank you cards I made a few weeks ago.  

Friday, April 20, 2012

Sketch Cuts

I received a letter today from my good friend, Jinnee. It was an invitation to visit her new blog, Sketch Cuts. I have been bugging her to create a blog for some time now and all I can say is WOW. She doesn't mess around when she sets her mind to something! Go big or go home? She went way big in my opinion! I am loving every little thing about it. She has great ideas, tutorials, tips and photos! This is a picture of what I received in my letter. She cut this cute little creature out on her Silhouette CameoPlease support her and check out her new blog Sketch Cuts

Sunday, April 15, 2012

Retiring Stamp Sets for 2012


Dates: April 15-May 31, 2012 (select items available while supplies last)
Hundreds of stamps and accessories from the 2011-2012 catalogs are retiring, and this is your chance to get them before they're gone. Many products are only available while supplies last, so be sure to get your orders in early!

Saturday, April 14, 2012

Daisies Card

These two fun cards were CASEd from the talented Georgeann Manning. Although her daisies look way better than mine. I just couldn't figure out how to get it symmetrical. I used the oval punch and each card took 10 ovals. I think the card looks uber cute if you take your fingers and roll the edges of the petals up a bit. The top card isn't actually using a button for the middle because it's too hard to mail sometimes so it's just a circle punched out. It works great for cards that need mailing. 

Sunday, April 8, 2012

Thank You Notes

I absolutely love clean and simple cards, but most of you know that by now. =) 
I'm enjoying all of my Big Shot embossing folders. It gives simple cards just that extra bit of a wow factor and adds detail without adding too much color or pzazz.  


Friday, April 6, 2012

Belated Valentine's Day

We had a secret Valentine gift exchange this past Valentine's day. This is what I made for my secret lover. I cut out a heart template and used it to stamp all the L's. I absolutely love how it turned out. 

Monday, March 19, 2012

Twins

Without reading the title of this post, did you notice a little trend with this card? Two onesies, two buttons, pink... My friend recently had twin girls! She had 3 kids under the age of 2!!! How insane is that?!? I went for a little visit today and honestly folks, I don't know how she does it. Makes me afraid of motherhood. And no, I'm not pregnant. 

Saturday, March 17, 2012

Happy Bermuda Bay Birthday!

Wow, I just found this post in my drafts... from who knows how long ago... 


Card Recipe

Stamps: Happy Everything (SU), Of The Earth (SU) 
Ink: Bermuda Bay and Summer Sun (SU), Versamark
Paper: Whisper White, Bermuda Bay, Elegant Eggplant
Embellishments: Corduroy buttons in Summer Sun (SU), Amethyst embossing powder (Stampendous), 
Tools: Heat gun

Friday, March 16, 2012

A Note of Thanks

So I was trying to be all smart and decided to crop the photo. Little did I realize that it'd turn out like this... Oh well! I recently needed to make a bunch of thank you cards and with time being very hard to come by, I needed these suckers to be fast and cute. I think they turned out quite cute and for the fast factor? Well it took a couple nights to finish but at least it got done, which is the important part. They are 3.5" x 3.5" the stamped image is just using a clear stamping block! I've wanted to use that technique for the longest time now and I'm so happy with how they turned out. At first, I couldn't get the block to look very good. One lady on youtube suggested spraying the block after you ink it with some water so it helps the ink distribute. 100% not needed folks. I just needed to stamp it on something semi-squishy. Whether that be a cutting mat or in my case, a little stack of card stock. Whatever you're stamping on just needs to have a bit of give for the block to really make contact with the card stock. Stamping on a hard desk surface failed miserably. Have a great weekend everyone! 

Gift Box

How cute is this little gift box?! We made this at our last team meeting as well and I didn't get around to posting the picture. The kraft boxes come in a set of 4 for only $3.89. Super easy to assemble. We just covered the 4 sides with the Sale-a-bration paper and on the top we used the new Designer Rosette Bigz XL die. It definitely beats punching the edges and scoring to make each rosette. Just run it through the machine and it cuts and scores for you! 
P.S. Please ignore the Charmin toilet paper in the background... =)

Sunday, March 11, 2012

Sweet Cake

If you haven't purchased this new stamp set yet, Sweet Cake, please do! I love the feel of this little stamp set. It's fun, hip and young looking. Everything that I feel I'm not right now. I can see myself getting a ton of use out of this little guy and I sure hope they keep it around for the new 2012/2013 catalogue. Hope you all had a great weekend. 

Sunday, March 4, 2012

The Chaos That Is My Refuge

I know everyone can relate to this post. =) At work, I hate disorganized work stations. Everything should be labelled, put in a binder or filed. At home... completely different story. I'm lucky enough to have the entire basement as my crafting area and I hope that when we start thinking about renovations for the basement, I'll be able to keep a large portion of the basement dedicated to my hobbies, with the exception of perhaps more built in shelving that will keep me more organized. In the meantime, my basement looks like the aftermath of a tornado with winds gusting up to 130 km/h. I have no shame in sharing my crafting area with you all because I know every one of you who reads this blog has tornadoes hitting on a regular basis too. So without further adieu, I present to you all, my basement refuge. 
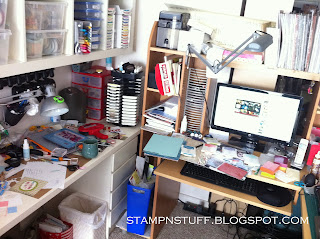
 I sit right on the middle of all this stuff so I have essentially 3 work surfaces. The one on left is my stamping area. The computer is where I lay out a lot of random things and blog of course. The right hand side which you can't see is where I keep my Simply Scored board and my Big Shot. There's actually a table that is an extension of my desk that you'll see in the last photo. 
This photo was taken this morning, no tidying, no adding of things (except my cup o' joe). 
 I realized I haven't labelled these new In Color stamp pads yet so that's why they are all laid out. I usually punch out a piece of the coordinating card stock with the word window punch and glue it onto the end of the stamp pad. It makes it way easier to see and sort. Stampin' Up sells sheets of labels with the ink pad names but I find this way much better. I don't have to worry about buying more labels if I get new In Colors or perhaps it's the simple fact that my aging eyes don't like reading those little tiny black letters. 
That table on the right is the extension I was talking about. It's got my big cutting mat on it for when I sew and need to cut fabric. Right now, it's storage for my thank you cards and that big red box of Project Life items. The table at the back is where I usually hold workshops but again, it's used for massive storage right now. So that's half my basement. Hope you enjoyed the tour and I would love to see your space so leave me a link to your post if you have something up already on your blog. =) Happy Sunday everyone. 
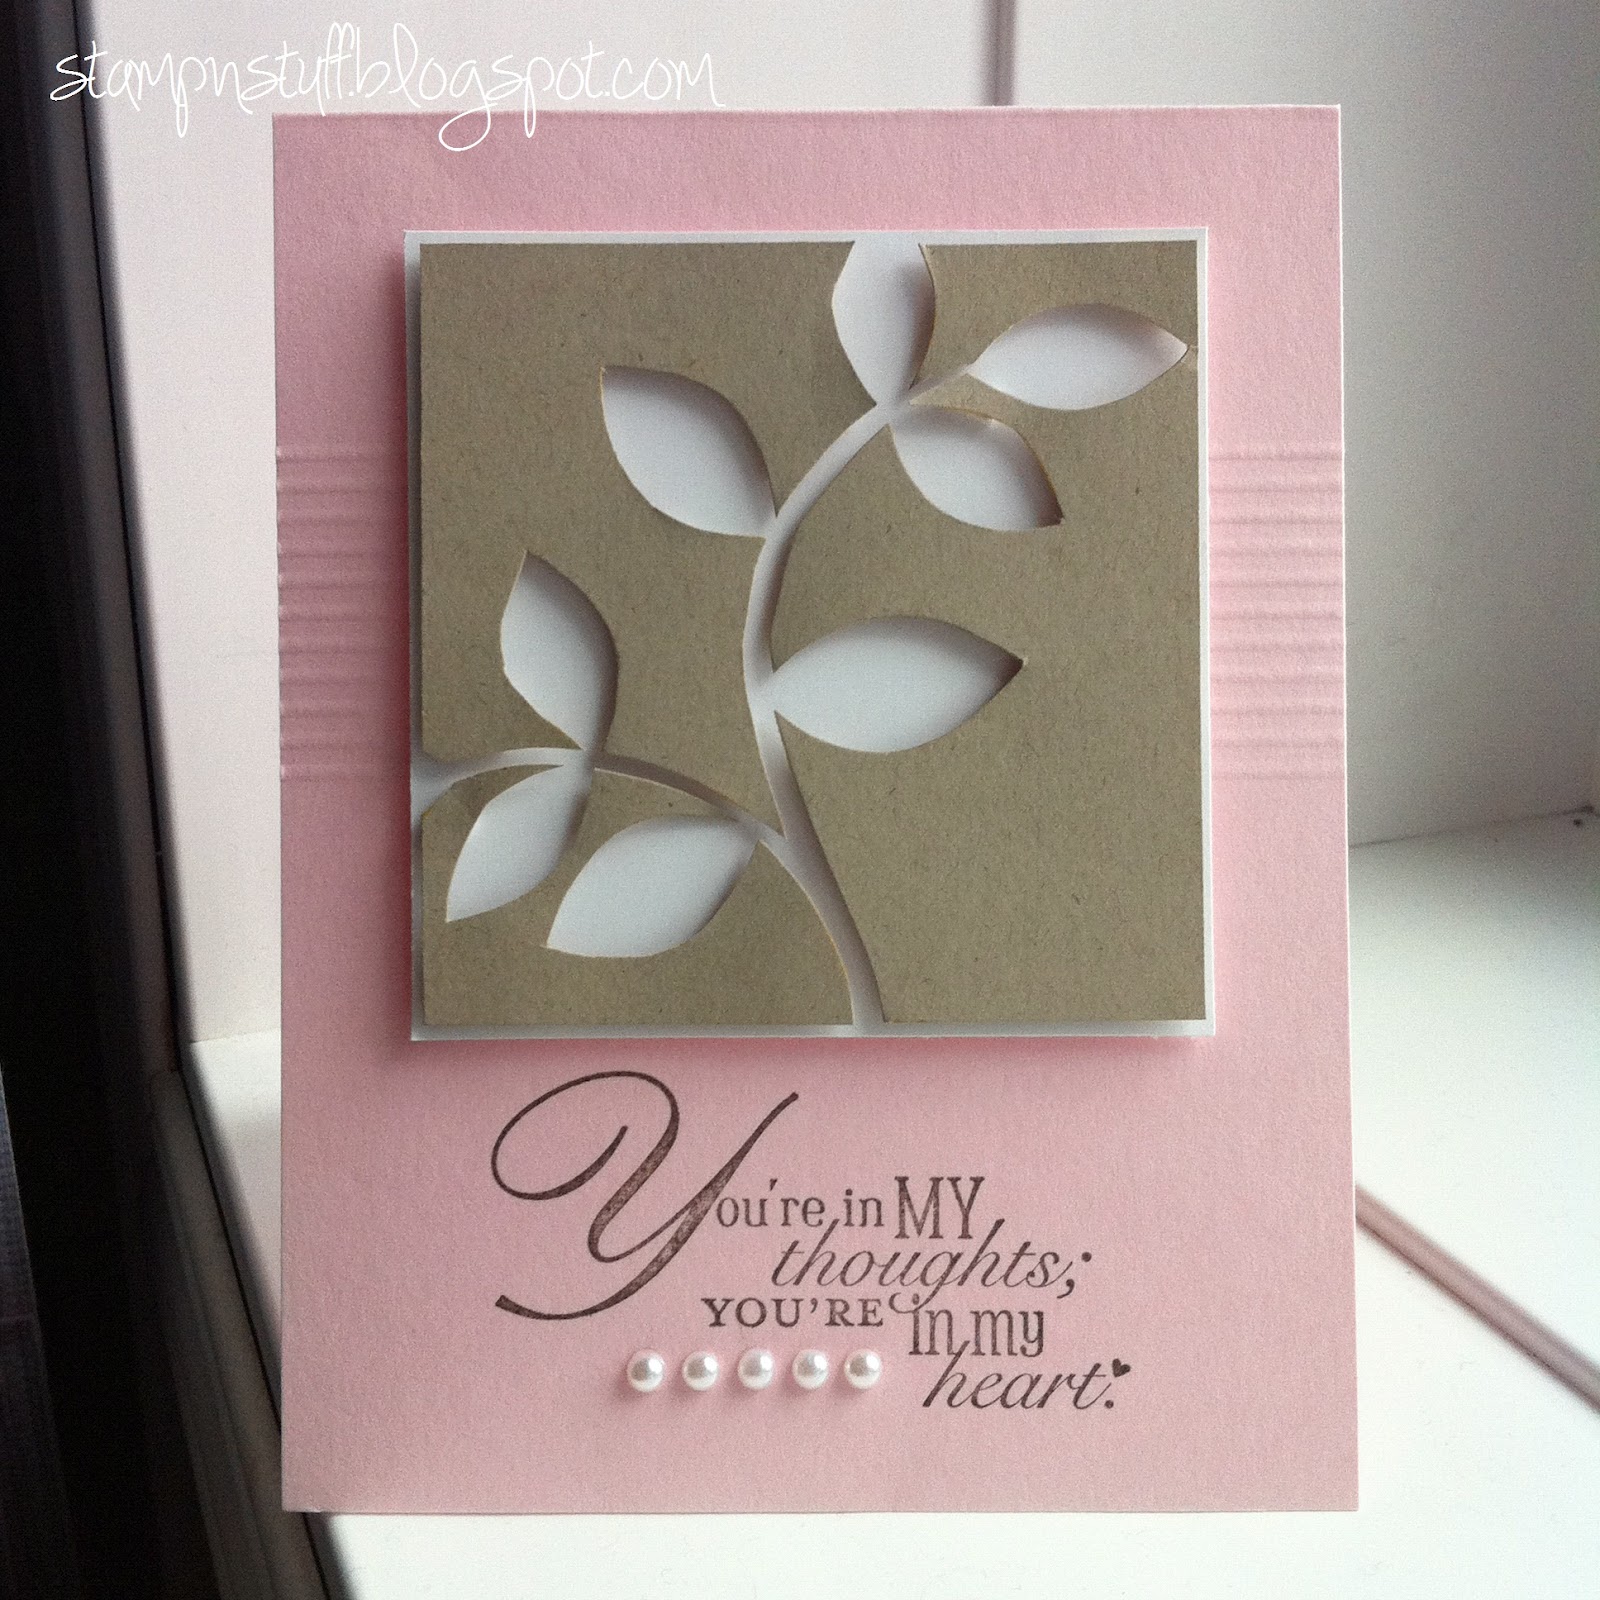
Thursday, March 1, 2012

A Bit Late

A dear friend had her birthday a few days ago. I didn't get a chance to see her so I decided to make a belated birthday card. I forgot about those little leaves die for the Big Shot and how much I love them! That houndstooth background wasn't my favorite but it's definitely growing on me. It works great as a background and not a focal point because some of the other impressions folders I have draw way too much attention. The card CASEd Kristina Werner's card found here

Friday, February 24, 2012

Girly, you rock!

Running off to dinner to celebrate a lovely friend's birthday. I CASE'd this card from the talented Kristina Werner. It uses the little heart punch from Stampin' Up! and the sentiment is from Papertrey Ink. I have forgotten how much I love Papertrey products. I'm making a trip down to the states a couple times this year. Perhaps I need to make another order... Have a great weekend everyone! 

Tuesday, February 14, 2012

Framelit Card

Ok I'm officially in LOVE. I've been aching and hoping and wishing for Stampin' Up to bring out their version of Nestabilities and they finally have! They are called framelits dies for the Big Shot. As soon as I saw the Labels Collection with the coordinating Apothecary Art stamp set, I knew I had to have it. The ribbon, stamp set, paper and brad can all be free items earned during Stampin' Up's annual Sale-A-Bration. It's the most wonderful time of the year in stamping world. If you had any inclination to venture into the paper crafting world, now is the time my friends! Hope everyone had a happy Valentine's day! 

Monday, February 13, 2012

Whole Face Smile!

Good evening everyone! Just wanted to do a quick share of another card we made at our meeting last month. It uses a ton of Sale-A-Bration items which is nice because all of the items can be earned for free! My favorite is still the paper by far. Off to bed! 

Friday, February 10, 2012

Happy Birthday

Yeech, iPhone photos sometimes aren't that great in low light situations are they? I figured it's either mediocre pictures with my iPhone that actually get posted or the non-existent photos that I don't get around to taking with my normal camera. As you can tell, I decided on option A. Sorry about the weird angle too. I guess I should have gotten down to eye level instead of sitting in my chair and guestimating. A few weekends ago, I attended a stamping meeting and it reminded me of the love I have for paper crafting. These meetings are always fun because we often will make 4 projects and this meeting was no different! We focused on using Sale-A-Bration and new catalogue items and the cards turned out great! I'll post all our projects over the next few days. Here's card uno! I'm actually really enjoying that stamp set and even the fun new ribbon! And if you know me at all, you can never go wrong with Crumb Cake (aka Kraft) card stock! 

Monday, February 6, 2012

Baby Card

What can I say other than my life has been super hectic? One would think that with the wedding behind me now, I'd have loads of time to craft... The problem is I've picked up several other hobbies along the way. I've discovered that I love fabric just as much as I love paper. I've also discovered that I'm really enjoying photography. Those two things have been eating up my time along with the lingering wedding bits like thank you cards and the big honeymoon! There have been a lot of babies happening at work lately. A lot. We had a little play date today and I whipped up a card quickly. I went to a stamping meeting last weekend and it was great fun! It reminded me of how much I missed stamping so hopefully I'll get back into the paper and ink soon.